Introduction

Artillery3D has been making desktop 3D printers since 2018. Based in Shenzhen China. According to their website they were ranked amongst the top 10 desktop FDM 3D printing manufacturers by 2019. Today we are reviewing their latest FDM entry into the space and also their first Bowden style 3D printer, it’s aimed at the Ender 3 market with similar features and a competitive price point. The Hornet is currently listed for $359 CAD/ 259 USD.

Learn more about Artillery 3D here.

Tech Specs

  • Build Volume: 220x220x250mm

  • Frame Dimensions: 470 x 450 x 510mm

  • Print Speed: 60-100mm/s

  • Filament Size: 1.75mm

  • Nozzle Diameter: 0.4mm

  • Nozzle Temperature: 240c

  • Bed Temperature: 80c

  • Layer Height: 0.1-0.32mm

  • Material Compatibility: PLA, PETG, and TPU

  • Power: 24v

  • Bowden with Titan Style Extruder

  • 32 Bit Control Board – designed by Artillery

  • Top Mounted Z axis motor

  • X-Axis Belt Tensioner

  • USB Connection or SD Card

  • Marlin 2.0 Firmware

Unboxing and Contents

USB SD Card Reader Included!

The printer showed up well packaged and undamaged in an Artillery3d branded twin core cardboard box. It seemed to be well packed and protected with industrial strength laser cut foam for all the parts to fit perfectly into. Any moving parts were secured tightly with zip ties. After unpacking the printer, it was extremely easy to build.

All components were removed without hassle and easy to assemble without instructions. The unboxing process was straight forward with components coming out easily. The top included the improved filament holder, instructions, Bowden tube and tucked away with extra foam protection was the matching hot end. The second layer included the z axis tower with screws pre mounted to it for easy assembly and finally the base which everything simply attached to.

We immediately thought of Bumblebee from Transformers upon seeing the yellow style. We actually really love the look of the Hornet, the rails are brushed instead of plain metal which helps differentiate itself from the growing entry level FDM 3d printer space and it’s got a nice handle on the top of the z axis rails for comfortable transportation.

Contents List:

  • Bumblebee Styled Base
  • Nozzle Assembly
  • Z Axis Tower
  • Spool Holder
  • Bowden/Electronics AIO harness
  • Manual
  • USB SD Card adapter
  • 4GB SD Card
  • USB Cable
  • Artillery branded pouch with necessary
    • Allen Keys
    • 10mm wrench
    • Spare z stop
    • Zip Ties
    • Spare V-Slot Wheels
    • Additional 0.4mm Nozzle

Assembly

The Artillery Hornet was EXTREMELY easy to build. It took 13 minutes including reading the manual.

A total of 7 screws: 4 pre screwed into the base for the z axis to attach to and 3 on the printer head itself. After assembly, it’s as easy as connecting a few cable ends and the Bowden tube with electronics wrapped into one.

The all in one Bowden with electronics is a neat idea although potentially a downfall of this otherwise great machine. This means if you have a clog and need to remove the tube, the nozzle will immediately start to cool down. With that being said, it all connected without issue using a threaded connector on both sides and we have yet to have a clogging issue after approx. 3 weeks of use.

Once fully assembled and connected to power we turned it on for the initial bed leveling process which proved to be a breeze and started our first test prints.

Initial Impression and Bed Leveling

Whisper Quiet

Upon turning the machine on you are greeted with Marlin 2.0.7.2 which has plenty of additional features over our Ender 3 Pro like the “level bed” feature touched on below.

One thing about entry level FDM 3D printers is they almost always come with a plastic extruder and unfortunately the Hornet isn’t an exception, over time these wear out and you will need to replace it.

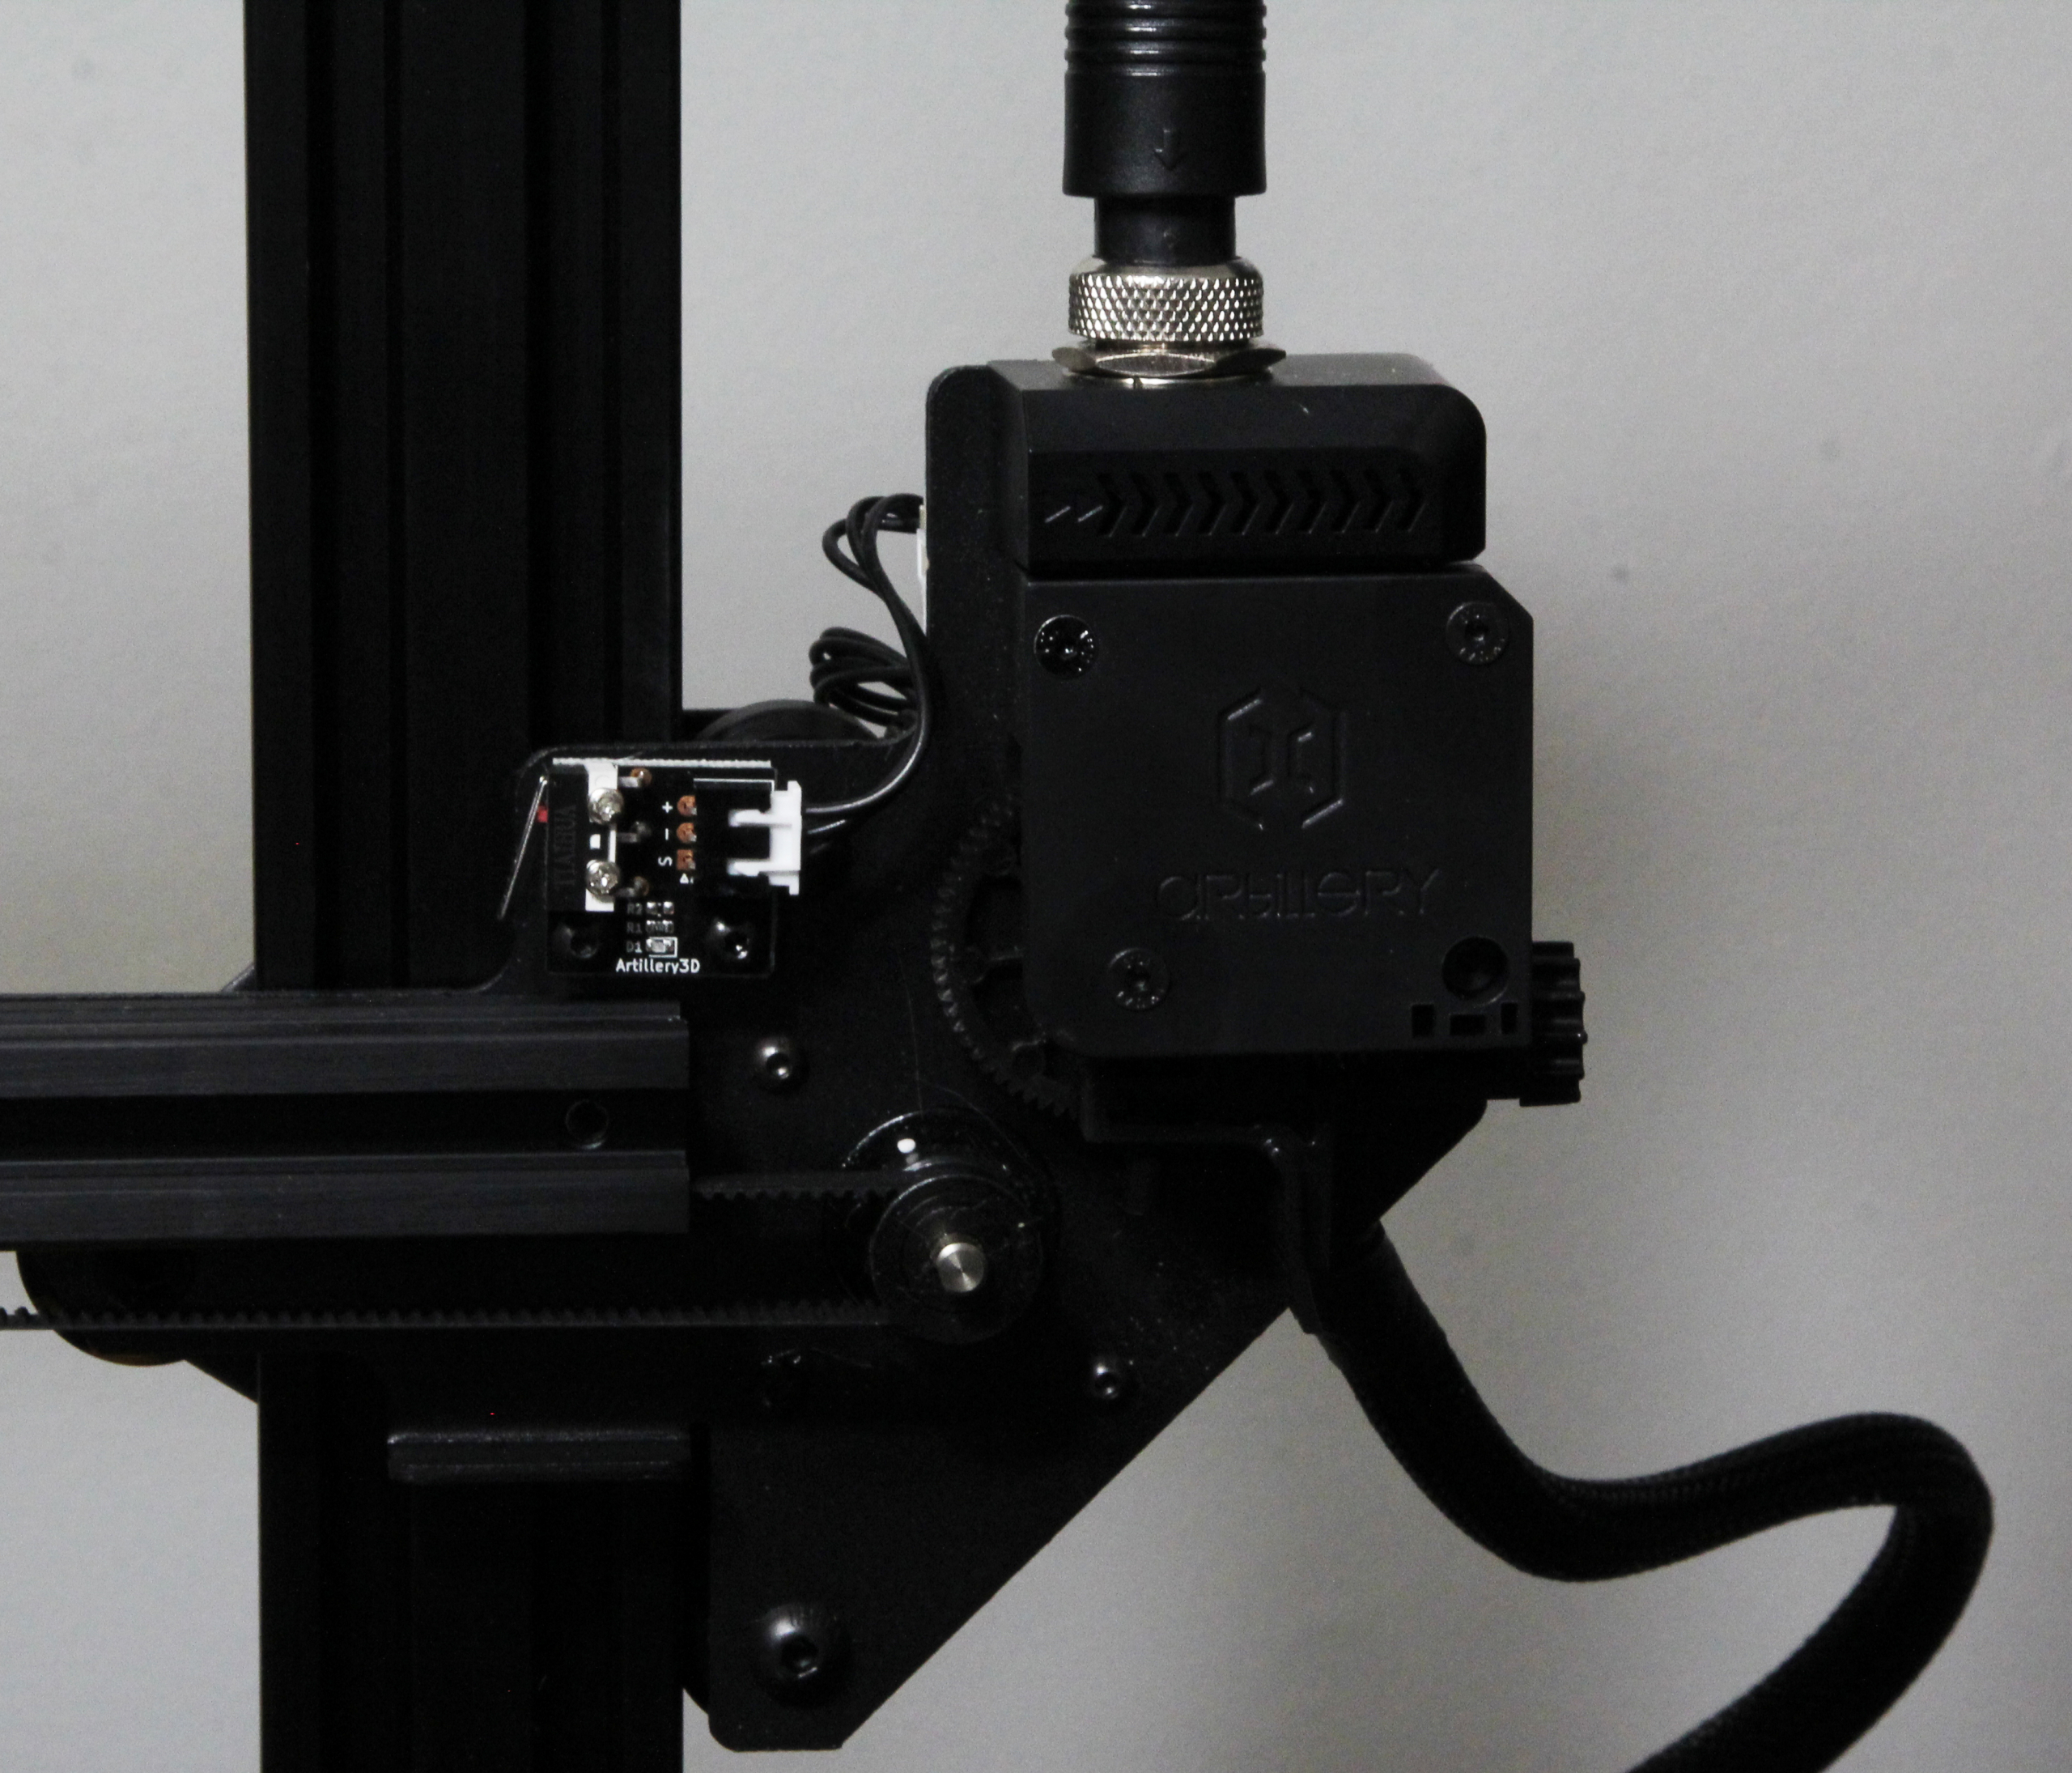
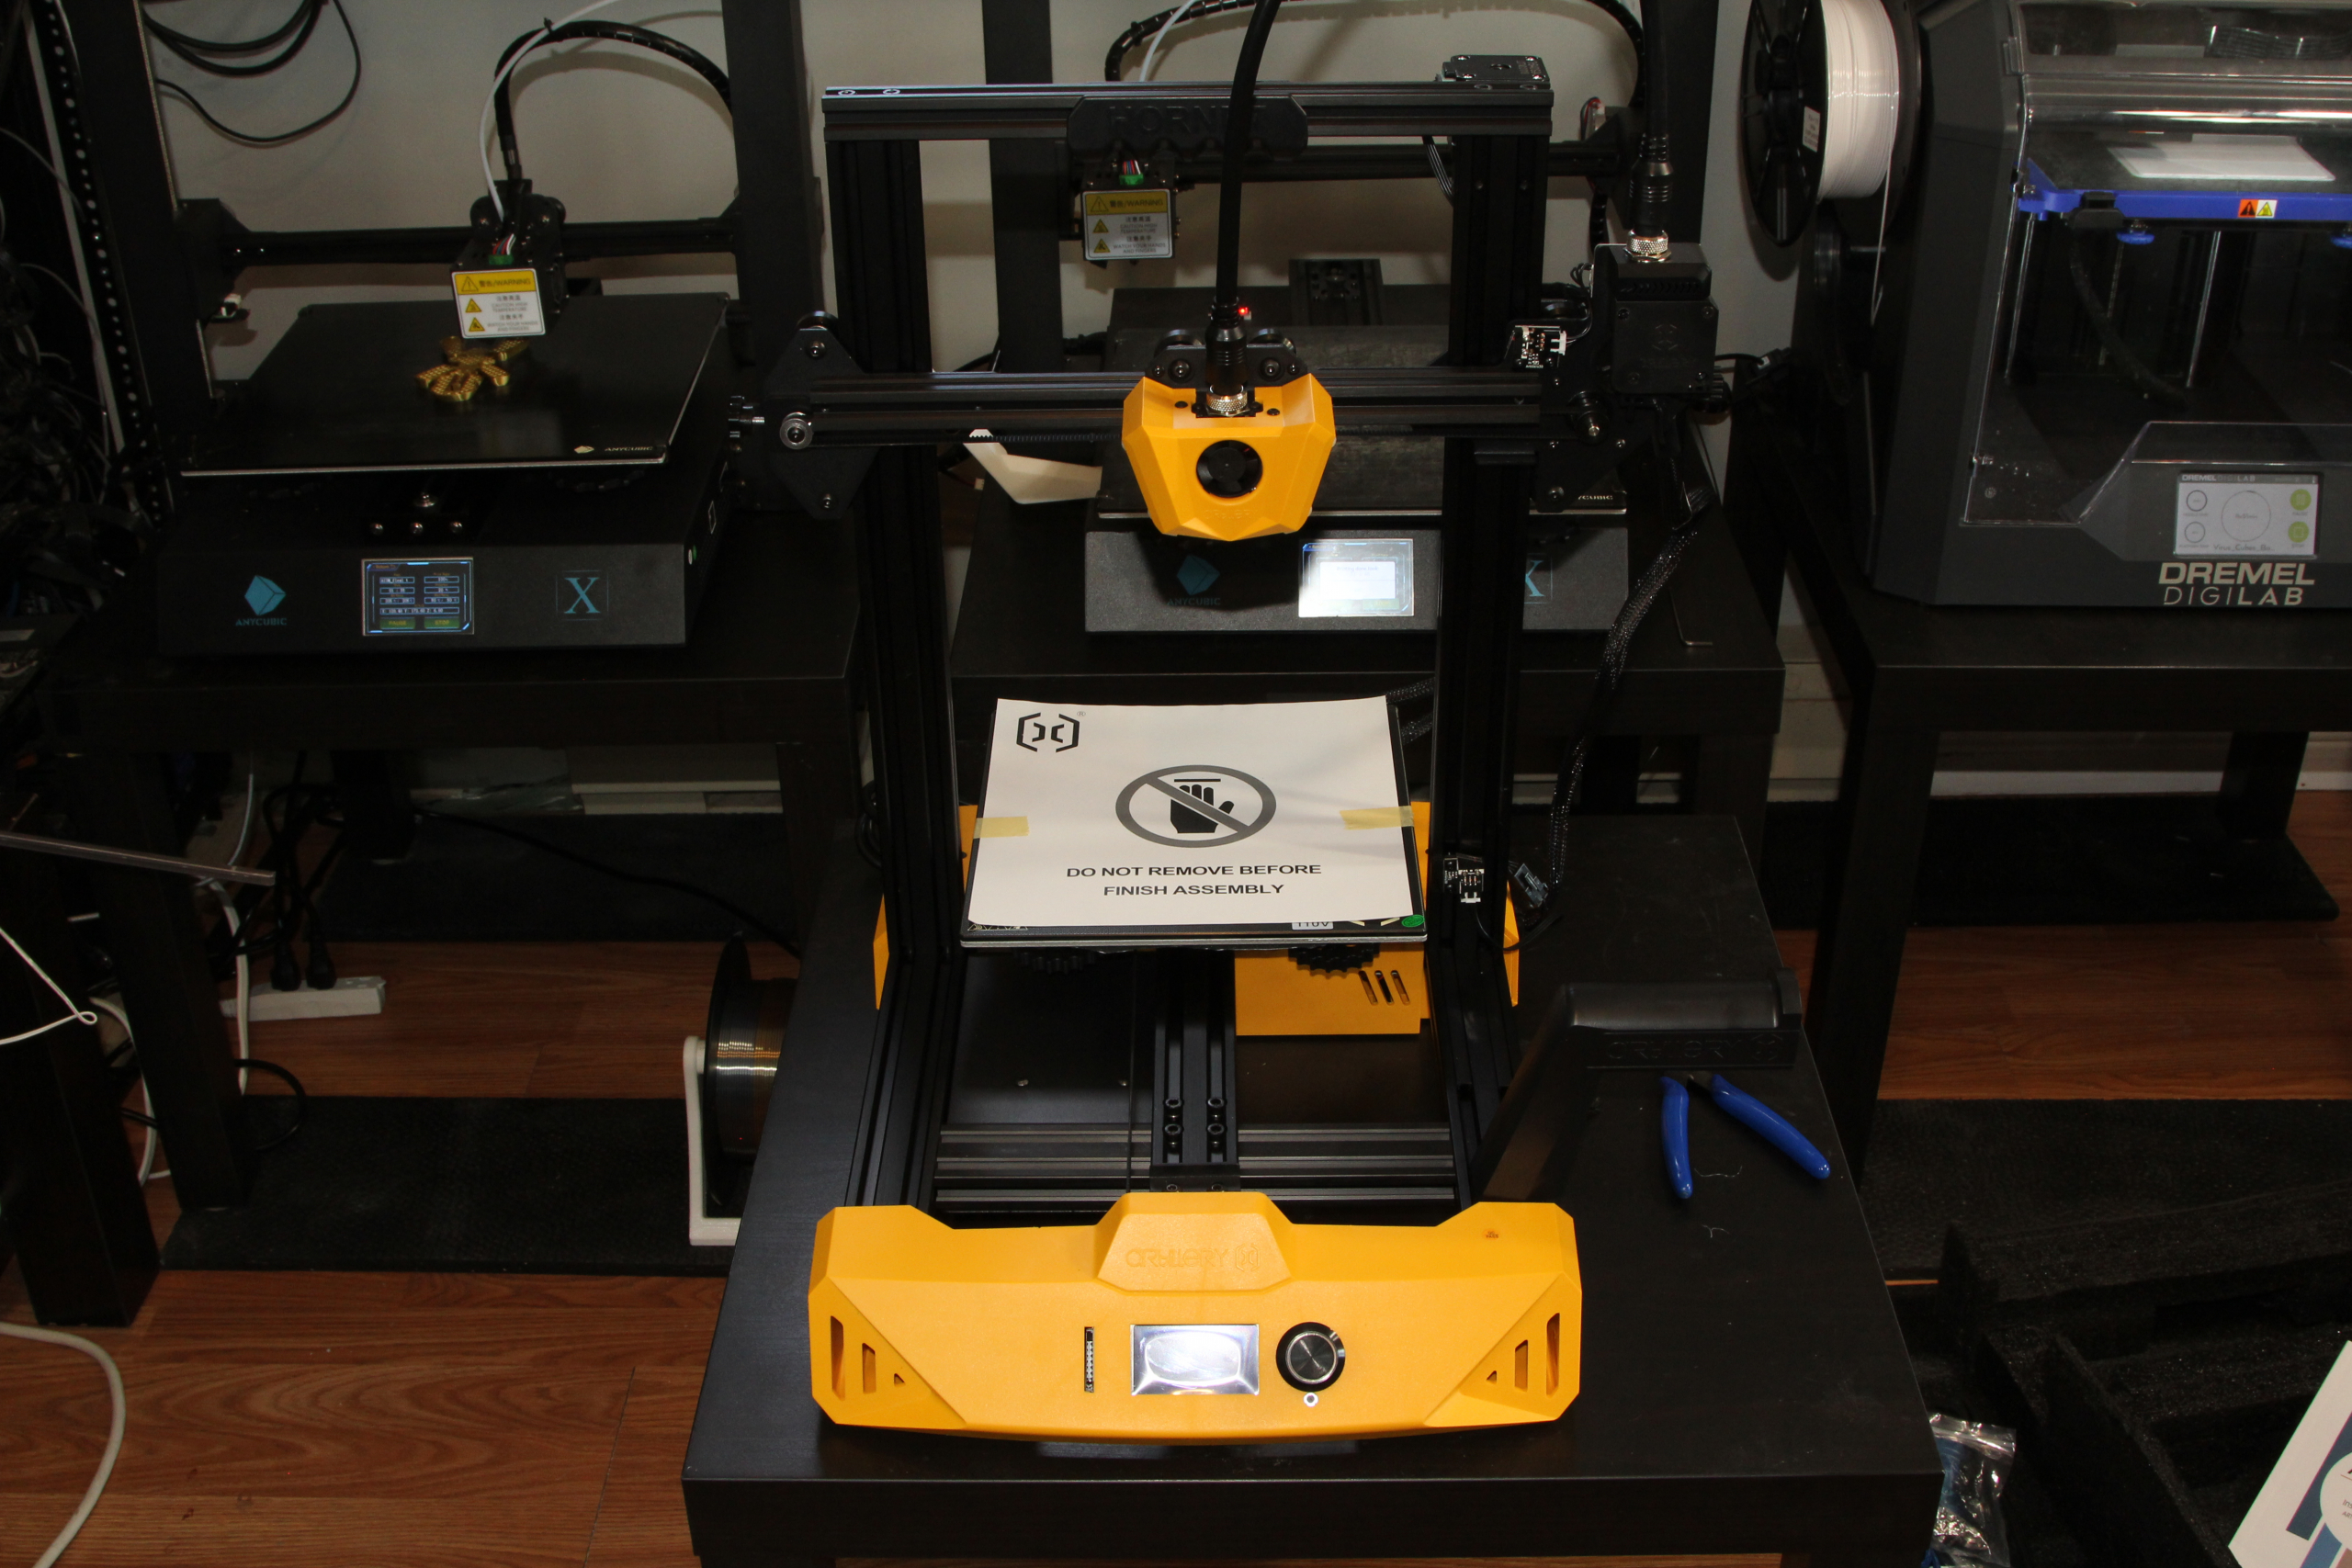
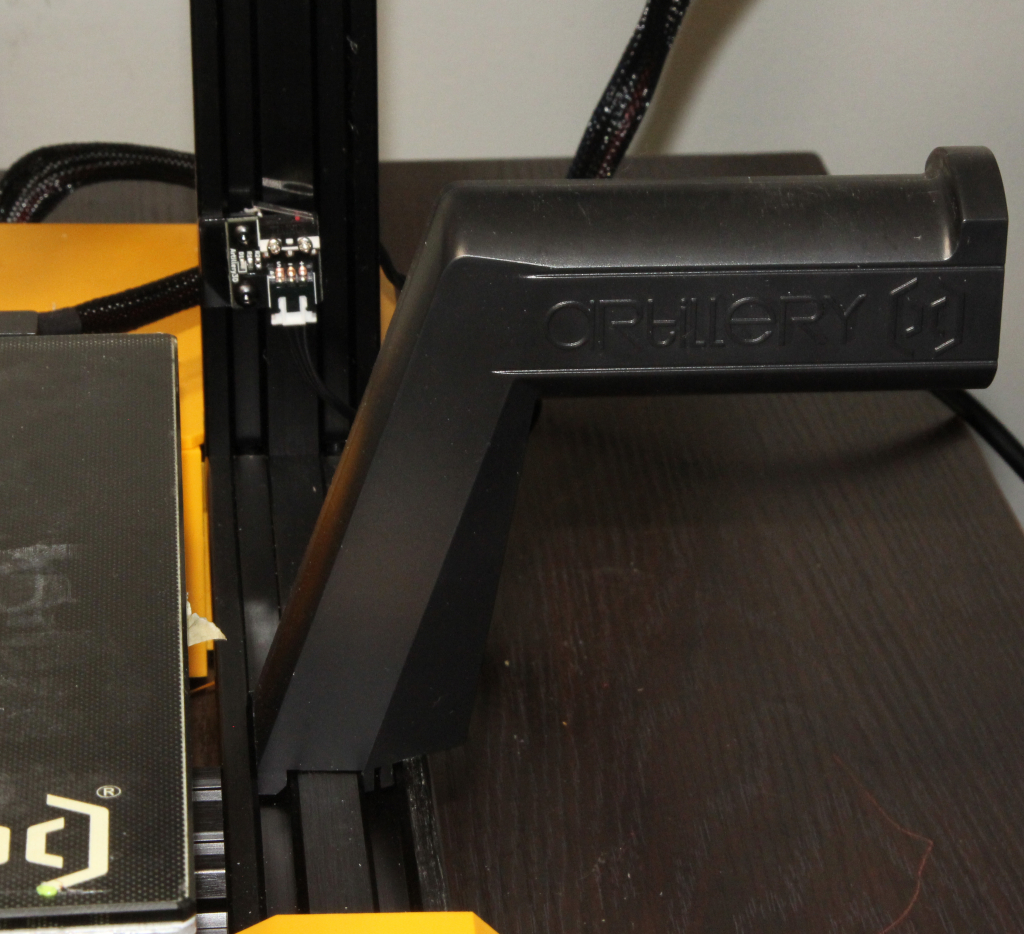
Inverted Z axis is an interesting choice by Artillery, its supposed to help minimize z wobble but based on some of our prints we’re not convinced.

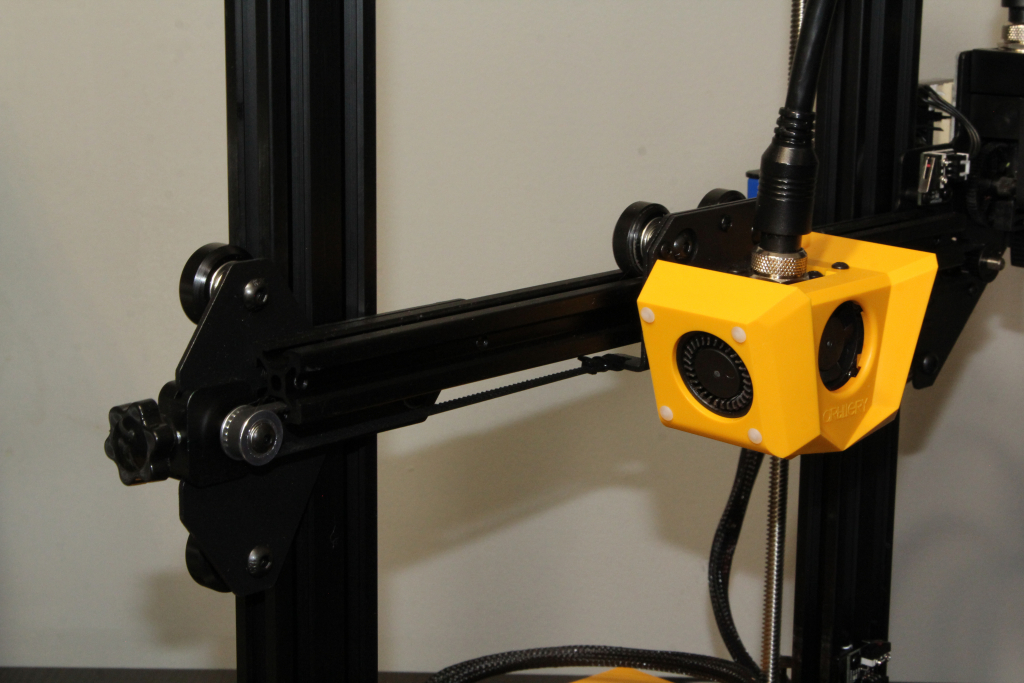
The hot end is very fancy looking with twin fans and a nice matching yellow cover which after 3+ weeks of using it are still whisper quiet. The heat brake itself is a v6 clone, similar to what’s used on competing printers like the Ender 3 Pro.

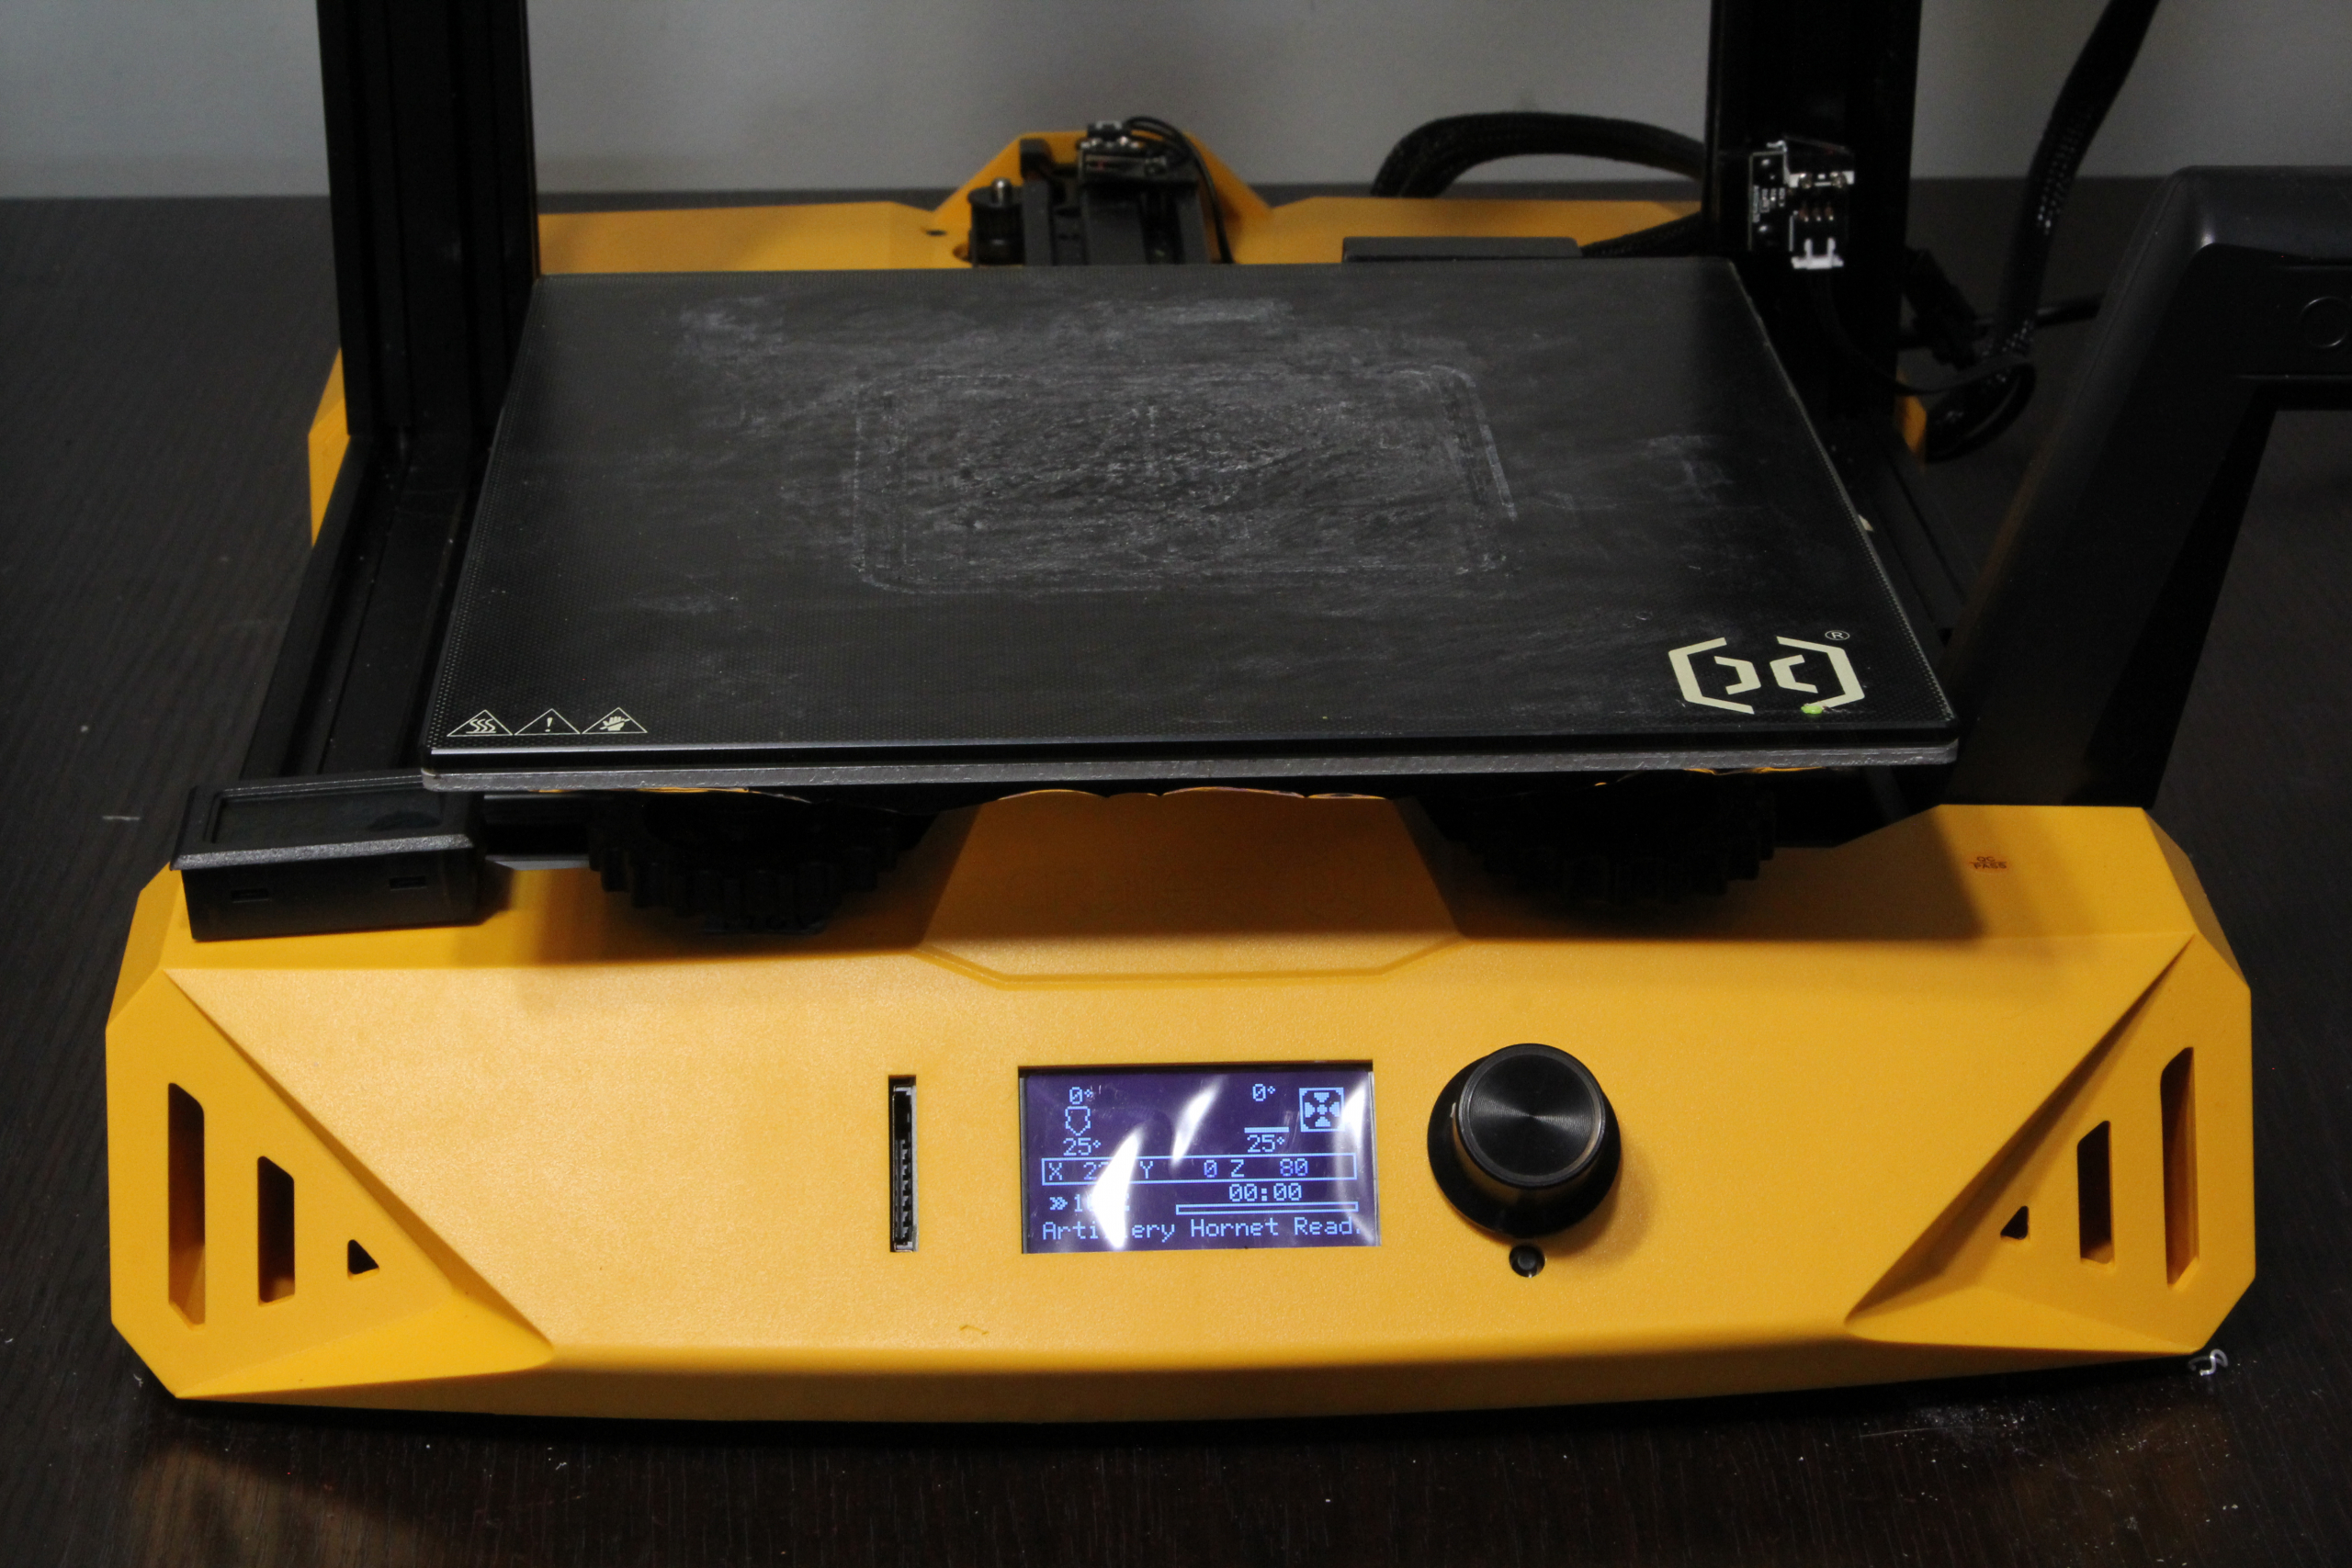
One thing that may be a deal breaker to some is the older style rotary knob system and not a touch screen but in our opinion it works well, especially with all the features that Marlin 2.x is packed with.

Leveling the glass bed is the same as any other traditional FDM 3d printer: use a sheet of paper between the nozzle and bed to ensure minimal friction, measuring 4 to 9 points.

The bed itself is Ultrabase coated which helps with adhesion when hot and then once cooled allows prints to be more easily removed. A nice touch is the bottom of the bed is insulated, the only other printer we have that does this is the Dremel 3D45.

Then we were off to our first prints. What is nice about the Marlin 2.x firmware is the built in feature to level the corners which is faster than using the traditional x/y/z axis menus.

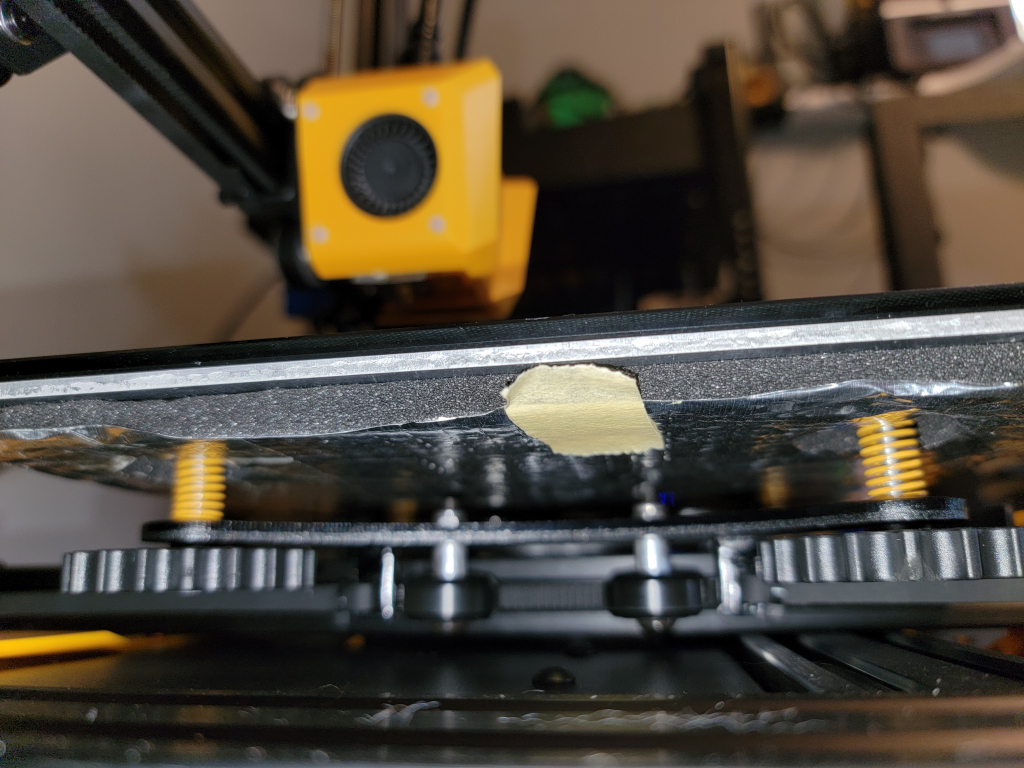
The heated bed can reach 80c fairly quickly but after the first few prints we started to have adhesion problems so we used invisible purple glue as an insurance policy (we do on most of our beds anyway).

We initially printed the provided Arillery3D test cube and it turned out great, second we printed the traditional 3D Benchy and it turned out equally as good. See our prints section for more details on some issues we noticed.

One thing we immediately noticed is how quiet the operation is even when printing for long periods of time.

The Hornet has a hand adjustable belt tensioner which makes maintenance easier than some of the competitors in the entry level space and an updated adjustable filament holder which has been a pain point on previous Artillery printers but it’s also lacking a few features we have become accustomed to such as no filament run out sensor, no touch screen and oddly enough no scraper for removing prints from the build plate. 

Cura Profiles and Print Quality

Included on the SD card were 3 Cura profiles: Fine, Normal and Fast. Each of the settings can be referenced below:

Fine:
0.12mm Layer Height
1.2mm Wall Thickness (3 Walls)
20% Infill – Grid
60mm/s Speed (60mm/s Infill, 30mm/s Walls)

Normal:
0.2mm Layer Height
1.2mm Wall Thickness (3 Walls)
20% Infill – Grid
80mm/s Speed (80mm/s Infill, 40mm/s Walls)

Fast:
0.3mm Layer Height
1.2mm Wall Thickness (3 Walls)
20% Infill – Grid
80mm/s Speed (80mm/s Infill, 40mm/s Walls)

We came away impressed with the “fine” profile because its standard speed is 60mm/s and producing some very nice results in comparison to our Dremel which usually runs at 40mm/s.

ArtilleryHornet-Prints-1498

Test Prints

Artillery Cube
3D Benchy – 0.2mm layer height
Super Stress Test – 0.2mm layer height
Yoda Bust – 0.12mm layer height
Mayan Temple Dice Tower – 0.12mm layer height
Croc Nuts  – 0.1mm layer height
Wings of Victory – 0.12mm layer height
Copper Vase in Vase Mode – 0.1mm, vase mode
Excavator – 0.2mm layer height
DND Dice Holder – 0.1mm layer height

The print quality out of the box was impressive but not perfect, see the Yoda bust designed by Fotismint, Wings of Victory statue from Scan the World and the Mayan Temple dice tower. There are clear layer lines which as of writing we still have not been able to rectify which makes us hesitant to print anything high detail on the Hornet.

The Croc Nuts we printed had issues separating from the supports which was a little frustrating when compared to them printed on the Ender 3 or Mega X, luckily this is only a matter of tweaking support settings but an entry level user may not know how to do such a thing and may not be comfortable with this.

If you are looking for more print specific settings please check our Instagram (@avk3d) posts or shoot us a DM.

Conclusion

Overall, the Artillery Hornet is a great printer for the price point it sits in, unfortunately it is also lacking some standard features such as a filament runout sensor, starter tools like a scraper which are standard on most entry level printers in this range. These are all relatively cheap items that someone buying their first printer should have out of the box however, they did opt to include a USB SD card reader for those that may not have one, the SD card they include is also a micro with the regular size adapter which gives you lots of flexibility, the handle on the top is nice to have.

Another issue is the out of the box quality in our case was okay but definitely not as good as the Anycubic Mega X and most who buy an entry level printer likely aren’t going to be calibrating e-steps, adjusting the eccentric nut, belt tension etc before printing so it’s a little disappointing theres a few things that unless you’re already a hobbyist with multiple printers, you wouldn’t know any better.

The printer itself feels high quality with the brushed aluminum rails, the Bumblebee styling choice sets it apart from the rest of the copycat printers that look like another Ender 3.

Overall it’s a great starter printer but beware it may require some tweaking to get top notch prints and if it’s your first printer it will be a large learning curve to start.

Positives

Attractive styling
Upgraded filament holder
Fast
Whisper Quiet
Unique Bowden/electronics AIO which provides a strong direct drive like feed to the hot end
Marlin 2.0.7.2
Knob for adjusting the belt on the z axis

Negatives

Slow filament load
Needs a bit of tuning out of the box
No sample filament
No scraper
No filament run out sensor
Support issues with default profiles

Other Notes

QC: The rear right bed always seemed to be a bit unlevel no matter how much leveling we did with both the “level corners” and “level bed” features within Marilin 2.x.x

As noted in the print section, the out of the box prints were okay but not as good as some competitors printers in the same space. For a beginner user there should be a little more testing done to ensure the eccentric nut, the belt and esteps are calibrated 100% properly to ensure the best print quality out of the box.

Supports: We printed some croc nuts and the support adhesion seemed to be a little high on the default settings (provided on the printer profiles on the sd card so this will take some tweaking to figure out) this was not an issue even on the new stock Anycubic Mega X we received about a week before.

Build Plate: The build plate is actually glued to the heating pad which for some users may be annoying, for us its not an issue but were not sure why they didnt opt for traditional clips like most manufacturers.

**The below link is an amazon referral link and AVK3D will receive a portion of the sale.

Leave a Reply